Meteor Tutorial - Let's build a Twitter clone (Part 2: Client-side Template Javascript)
This is part 2 of the twitterClone Meteor tutorial.
| Part 1 - Intro to Meteor | link |
| Part 2 - Client Template JS | link |
| Part 3 - User Account | link |
| Part 4 - Security & Structure | link |
| Part 5 - Server Methods | link |
| Part 6 - Data Publish/Subscribe | link |
We will be learning about client-side template of Meteor. The goal of this part is to build a tweetbox:
Here are the key features I want to implement:
- Change the character count as you type
- The button should be disabled if there is no text
- Save the data to mongodb when you click Tweet
The completed code is on github.
Section 1: Get Bootstrap UI
I am not a UI expert/designer. I will completely depend on bootstrap for this tutorial. Meteor offers a package manager similar to npm. You can add packages using meteor add package-name. You can check a atomsphereJS.
meteor add twbs:bootstrap
Your command prompt should show that the package has been added and the server restarted:
=> App running at: http://localhost:3000/

Changes to your project's package version selections:

twbs:bootstrap  added, version 3.3.5

=> Meteor server restarted
Server restarted by itself? That's right! Meteor supports hot code push out-of-the-box. Any changes to make to the code will get automatically push to both the server and the clients.
Section 2: TweetBox UI Components
twitterClone.css
.tweetbox-container {
  margin: 45px;
}

.tweetbox {
  background-color: rgb(240, 247, 254);
}

.btnGroup {
  margin-top: 10px;
  display: flex;
  align-items: center;
}

.charCount {
  margin-right: 10px;
  color: gray;
}

.errCharCount {
  margin-right: 10px;
  color: red;
}
twitterClone.html
<head>
  <title>twitterClone</title>
</head>

<body>
  {{> tweetBox}}
</body>

<template name="tweetBox">
  <div class="tweetbox-container">
    <div class="panel panel-default tweetbox col-md-6">
      <div class="panel-body">
        <!-- Text box for tweet content -->
        <textarea class="form-control" id="tweetText" placeholder="What's happening?" rows="3"></textarea>

        <!-- Character count & button -->
        <div class="pull-right btnGroup">
          <strong class="{{charClass}}">{{charCount}}</strong>
          <button class="btn btn-info pull-right" type="button" {{disableButton}}>Tweet</button>
        </div>

      </div>
    </div>
  </div>
</template>
That was quite a bit of HTML code to get the UI looking nice. There are only three components that you should worry about.
- The textbox:
<textarea class="form-control" id="tweetText" placeholder="What's happening?" rows="3"></textarea>
This should be nothing new to the folks who have experience writing any HTML at all. This is a textbox for users to input the tweet content.
- The character countdown:
<strong class="{{charClass}}">{{charCount}}</strong>
There are two functions here that need to be implemented in the javascript helpers block.
charClass should return the correct css class to be used by this element. If the # of characters is greater than max (140), then this class should change the text to red. Blaze allows you to inject this variable from the javascript.
charCount should return an integer representing the # of characters remaining. We will implement this logic in the javascript as well.
- The tweet button:
<button class="btn btn-info pull-right" type="button" {{disableButton}}>Tweet</button>
The button should be disabled if the textbox is empty or over 140 characters. We will implement disableButton function in the javascript helpers. It should return a string, either be 'disabled' or empty.
Take-away
You can dynamically insert html elements, tags, classes, components, etc by using Meteor's blaze framework. You can easily modify what the UI render will look like without worrying about complicated front-end logic.
Section 3: Counter & Tweet Button JS
We want to keep a counter of character count in the tweetbox. Meteor templates offer three lifecycle callback functions onCreated, onDestroyed, and onRendered. We can set the initial character counter to zero when the tweetBox template is rendered.
Template.tweetBox.onRendered(function () {
  Session.set('numChars', 0);
});
We want to update the character counter when the user types content into the textbox. We can add an event listener for input into #tweetText element. This syntax is quite similar to that of jQuery. tweetText is the id of the DOM element.
Template.tweetBox.events({
  'input #tweetText': function(){
    Session.set('numChars', $('#tweetText').val().length);
  }
});
Lastly, we want helper methods to push session variable changes into the HTML. Again, from the HTML, there are three variables we need to implement: {{charClass}}, {{charCount}}, and {{disableButton}}.
Template.tweetBox.helpers({
  charCount: function() {
    return 140 - Session.get('numChars');
  },

  charClass: function() {
    if (Session.get('numChars') > 140) {
      return 'errCharCount';    //css class name
    } else {
      return 'charCount';       //css class name
    }
  },

  disableButton: function() {
    if (Session.get('numChars') <= 0 ||
        Session.get('numChars') > 140) {
      return 'disabled';
    }
  }
});
You will notice that the changes to numChars actually reactively notify these helper methods to push new values into the DOM. However, if the helper method only has static values, it will not run when you update Session variables. Give this a try!
Section 4: Add Tweets to MongoDb
We need to add one more event listener inside of Template.tweetBox.events to insert data into mongoDB:
'click button': function() {
  var tweet = $('#tweetText').val();
  $('#tweetText').val("");
  Session.set('numChars', 0);
  Tweets.insert({message: tweet});
}
Before the isClient block, simply define the mongoDb collection:
Tweets = new Meteor.Collection("tweets");
This mongodb collection is accessible by both the client and the server without any additional code!
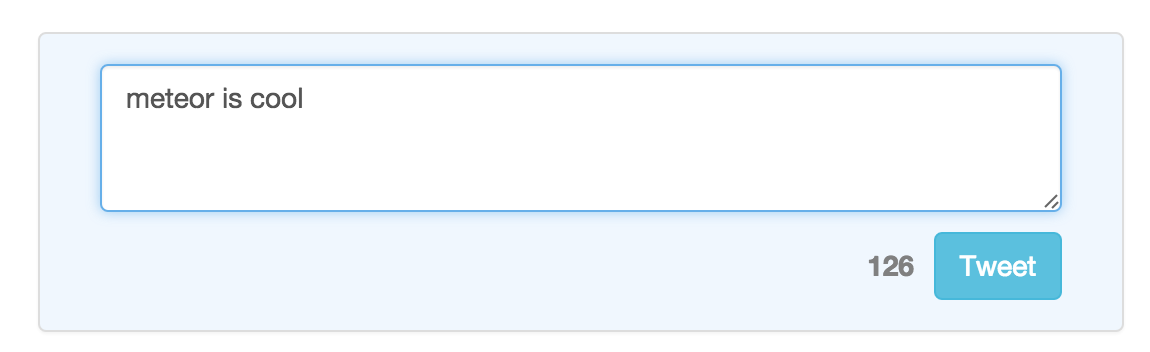
Now you can to try to tweet in the barebone tweetBox. This is the UI that you should see if you followed along:
We are not showing any tweets in the UI yet, so we need to use the mongodb console tool to see that the data is getting stored correctly. Meteor makes this process easy. In your project directory, you can type in
meteor mongo
mongo console should now show up in your terminal/cmd. I typed in db.tweets.find()
meteor:PRIMARY> db.tweets.find()
{ "_id" : "BbQczRMQp5FGQ39qa", "message" : "meteor is cool" }
Nice! That was pretty easy. We are inserting into the database directly in the client code. No need to be proxying db operations through a REST point. This is the power of Meteor. Additionally, Meteor supports the 'minimongo' package. The package stores an emulated mongodb on the client, this is an optimistic db operation that offers eventual consistency.
| Part 1 - Intro to Meteor | link |
| Part 2 - Client Template JS | link |
| Part 3 - User Account | link |
| Part 4 - Security & Structure | link |
| Part 5 - Server Methods | link |
| Part 6 - Data Publish/Subscribe | link |