Meteor Tutorial - Let's build a Twitter clone (Part 1: Intro to Meteor)
I want to show you how you can build a simple twitter clone using Meteor. I started writing Meteor code a few months ago. I fell in love with the simplicity and the client/server abstraction. Meteor the most pleasant js framework I have ever worked with.
The goal of this tutorial is to help you get started using Meteor. I will explain the 'Meteor' way of things without going into too much depth. I will take some architectural shortcuts to accelerate through the tutorial. I will not discuss best javascript practices.
This is part 1 of 6, each part of the tutorial explores a specific aspect of Meteor.
| Part 1 - Intro to Meteor | link |
| Part 2 - Client Template JS | link |
| Part 3 - User Account | link |
| Part 4 - Security & Structure | link |
| Part 5 - Server Methods | link |
| Part 6 - Data Publish/Subscribe | link |
You can find the completed code on my github.
The completed project demo is running here: http://twitter.randomdotnext.com/
What is Meteor? (and why everyone loves it)
Meteor is a full-stack javascript framework. While there are many full-stack js frameworks out there, most of them still draw a very distinct line between the server-side and the client-side. Oftentimes, it is non-trivial to interact between the server and the client. The goal of Meteor is to make the client/server line blurry, and the client/server interaction seamless.
Meteor is built on top of nodejs. The framework is famously opinionated about the libraries that you should use. The core Meteor deployment comes with mongodb, Blaze (front-end reactive framework), DPP. You can always swap those out for something you like, but we will focus on the core libraries for this tutorial.
Section 1: Installation & Setup
curl https://install.meteor.com/ | sh
(Windows folks go here: https://www.meteor.com/install)
Meteor installation comes with a command-line tool belt meteor. We will be using this to create our Meteor project.
meteor create twitterClone
cd twitterClone
meteor
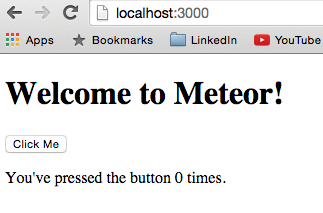
Your application is now running at localhost:3000. If you type it into your browser you will see a simple application running right away.

Section 2: Explore the barebone Meteor app
The javascript:
if (Meteor.isClient) {
  // counter starts at 0
  Session.setDefault('counter', 0);

  Template.hello.helpers({
    counter: function () {
      return Session.get('counter');
    }
  });

  Template.hello.events({
    'click button': function () {
      // increment the counter when button is clicked
      Session.set('counter', Session.get('counter') + 1);
    }
  });
}

if (Meteor.isServer) {
  Meteor.startup(function () {
    // code to run on server at startup
  });
}
The entire js application is placed inside the same file. And the server-side and client-side logic are separated only by the Meteor.isClient and Meteor.isServer blocks. This is of course poor design practice for larger applications (we will change this later). But the idea is that server and client side really do not need to be in completely separate modules.
Events block
Template.hello.events({
  'click button': function () {
    // increment the counter when button is clicked
    Session.set('counter', Session.get('counter') + 1);
  }
});
``` <br>
This is similar to jQuery style of listening to events. Each button click will increase `counter` variable. The variable is stored inside of a `Session` object. *Changes to variables stored inside the Session variable reactively notify all the listeners on that variable*. You might not understand what that sentence means yet, that's ok. You will. We have a helper that is listening to this variable right now.

**Helpers block**<br>
```language-javascript
Template.hello.helpers({
  counter: function () {
    return Session.get('counter');
  }
});
``` <br>
This function returns `Session.get('counter')`. This means that this helper function listens to changes happening to the Session variable `counter`. If the value of `counter` changes, this helper will notify the front-end that the HTML should render a new value.

**What is Template?**<br>
You see code like `Template.hello.events` here. Meteor contains front-end javascript logic within templates. So the code in events will only apply to HTML elements in the hello template, which is defined in the HTML. Isolating functions within a template helps you keep your code modular, and prevents having 'side-effects'.


**The HTML:**
```language-markup
<head>
  <title>twitterClone</title>
</head>

<body>
  <h1>Welcome to Meteor!</h1>

  {{> hello}}
</body>

<template name="hello">
  <button>Click Me</button>
  <p>You've pressed the button {{counter}} times.</p>
</template>
The head and body html syntax should be familiar to most readers. I'll cover the blaze component.
Template - hello
{{> hello}} is blaze/handlebar syntax for adding in a template. The hello template is defined in the html block <template name="hello>. Let's take a look at the <p> tag:
<p>You've pressed the button {{counter}} times.</p>
The {{counter}} bracket here is calling the counter method defined in the javascript helper block: counter: function (). Again, the values stored in Session variable will push the changes to this html component, so if the counter variable changes, this html element will re-render.
| Part 1 - Intro to Meteor | link |
| Part 2 - Client Template JS | link |
| Part 3 - User Account | link |
| Part 4 - Security & Structure | link |
| Part 5 - Server Methods | link |
| Part 6 - Data Publish/Subscribe | link |
